Shopping Cart


How to do semi-permanent manicure at home: Step-by-step guide
Have you ever wanted to have a perfect, long-lasting manicure without having to leave home? You are in the right place! In this article, we will show you how to do a semi-permanent manicure at home in a simple and effective way. If you're looking for an alternative to traditional nail polish that lasts longer, you've come to the right place! Keep reading and discover all the steps necessary to achieve a quality semi-permanent manicure.
What is semi-permanent manicure?
Semi-permanent manicure is a nail polish technique that combines the best of two worlds: the durability of gel nail polish and the ease of application of traditional nail polish. Unlike traditional nail polish, semi-permanent nail polish hardens under an LED or UV lamp, ensuring greater resistance and durability. You won't have to worry about constantly touching up your manicure! Semi-permanent nail polish can last 2-3 weeks before needing to be removed
Step by step to do a semi-permanent manicure at home
Step 1: Proper preparation Prepare for success!
Before you begin, make sure you have all the necessary tools on hand. You will need a semi-permanent manicure kit that includes:
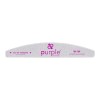
- Limto nail
- Primer
- Base
- Semi-permanent nail polish
- Finisher or Top Coat
- LED or UV lamp
- Other utensils: orange stick, cotton or cellulose and remover or nail polish remover.
In the case of 3-phase polishes, it is important to remove any residue or grease from the nails. To do this, use a primer or base that will help the base adhere better to the nail. This base will not only prolong the life of the polish, but it will also protect your nails and prevent the polish pigments from adhering and staining them yellow. Some foundations air dry, while others require an LED or UV lamp to dry.
Step 2:Application of semi-permanent polish Give color to your nails!
After applying the base, apply a thin layer of semi-permanent nail polish in the color of your choice and cure the nails under the LED or UV lamp. Repeat this step for even coverage, but remember not to apply too thick layers. Let your nails shine with style!
Here is a guide on whether or not the products we have on our website require lamp drying, so you know how to use them:
| Use | Product | Lamp drying |
| Primer | Primer SOS | No |
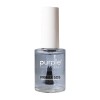
| Base | Bond Promoter | No |
| Base/Finisher | 2 Way Base & Top Coat | Yeah |
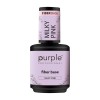
| Base | Fiber Base | Yeah |
| Base | Elastic Base | Yeah |
| Color | Gel Polish | Yeah |
| Finisher | Top Coat | Yeah |
| Limpiece of remains | cleaner | n/a |
| Remove | Soak Off | n/a |
Step 3:Completion and sealing
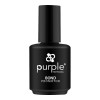
Once you have applied the desired coats of color, apply a coat of Top Coat to seal and protect the polish. One of the most popular top coats is the brand's 2 WayPurple Professional, which is very versatile and can be used as a base and as a finisher. Again, place your nails under the lamp so that the top coat can harden properly.
We must keep in mind that many of the bases, polish and finisher (Top Coat) have to be dried in a lamp. This process can vary from 30 seconds to 2 minutes depending on the type of lamp used, with LED lamps being the fastest, requiring 30 seconds to cure the enamel and 1 minute for the final seal.
Step 4:Removal of semi-permanent nail polish:
One of the most tedious parts is when we have to remove the semi-permanent polish, either because we have had nail growth or we want to change color, which is why we have more than 160 on our website! In our case,Purple Professionalmakes it easy for us. Simply file the shine off the nail, leave the nail exposed for 10 minutes in the Soak Off remover with the help of nail polish remover strips or a soaked cotton pad, and wrap the nail with a small piece of aluminum foil. After those 10 minutes, remove the rest of the polish with an orange stick, clean the nail and moisturize it gently. And you'll be ready for a new color!
Tips for a successful semi-permanent manicure
- Always follow the instructions of the semi-permanent manicure kit you choose, as specifications may vary between different brands.
- Apply products in thin layers to avoid cracking and premature polish peeling.
- Avoid getting the polish on the skin around your nails, as this could affect its adhesion and durability.
- Use a quality LED or UV lamp for best results and proper polish drying.
Now that you know how to do a semi-permanent manicure at home easily and effectively, get ready to show off fabulous nails without leaving your home! Follow the steps outlined in this article and use quality products for long-lasting, professional results. With a little practice, you can show off beautiful, perfectly polished nails. Enjoy your new semi-permanent manicure and be proud of your work!
Share this content